OCPP 1.6J configuration
OCPP1.6J, also known as 'box-level' OCPP 1.6J, is available on Zaptec Go,Zaptec Go2 and Zaptec Pro with supported firmware. This guide walks you through setting up and managing OCPP 1.6J functionalities on your Zaptec chargers.
Getting OCPP1.6J Permission
To use the OCPP1.6J authentication, you must have the necessary permissions in the Zaptec Portal:
- Log in to the Zaptec Portal.
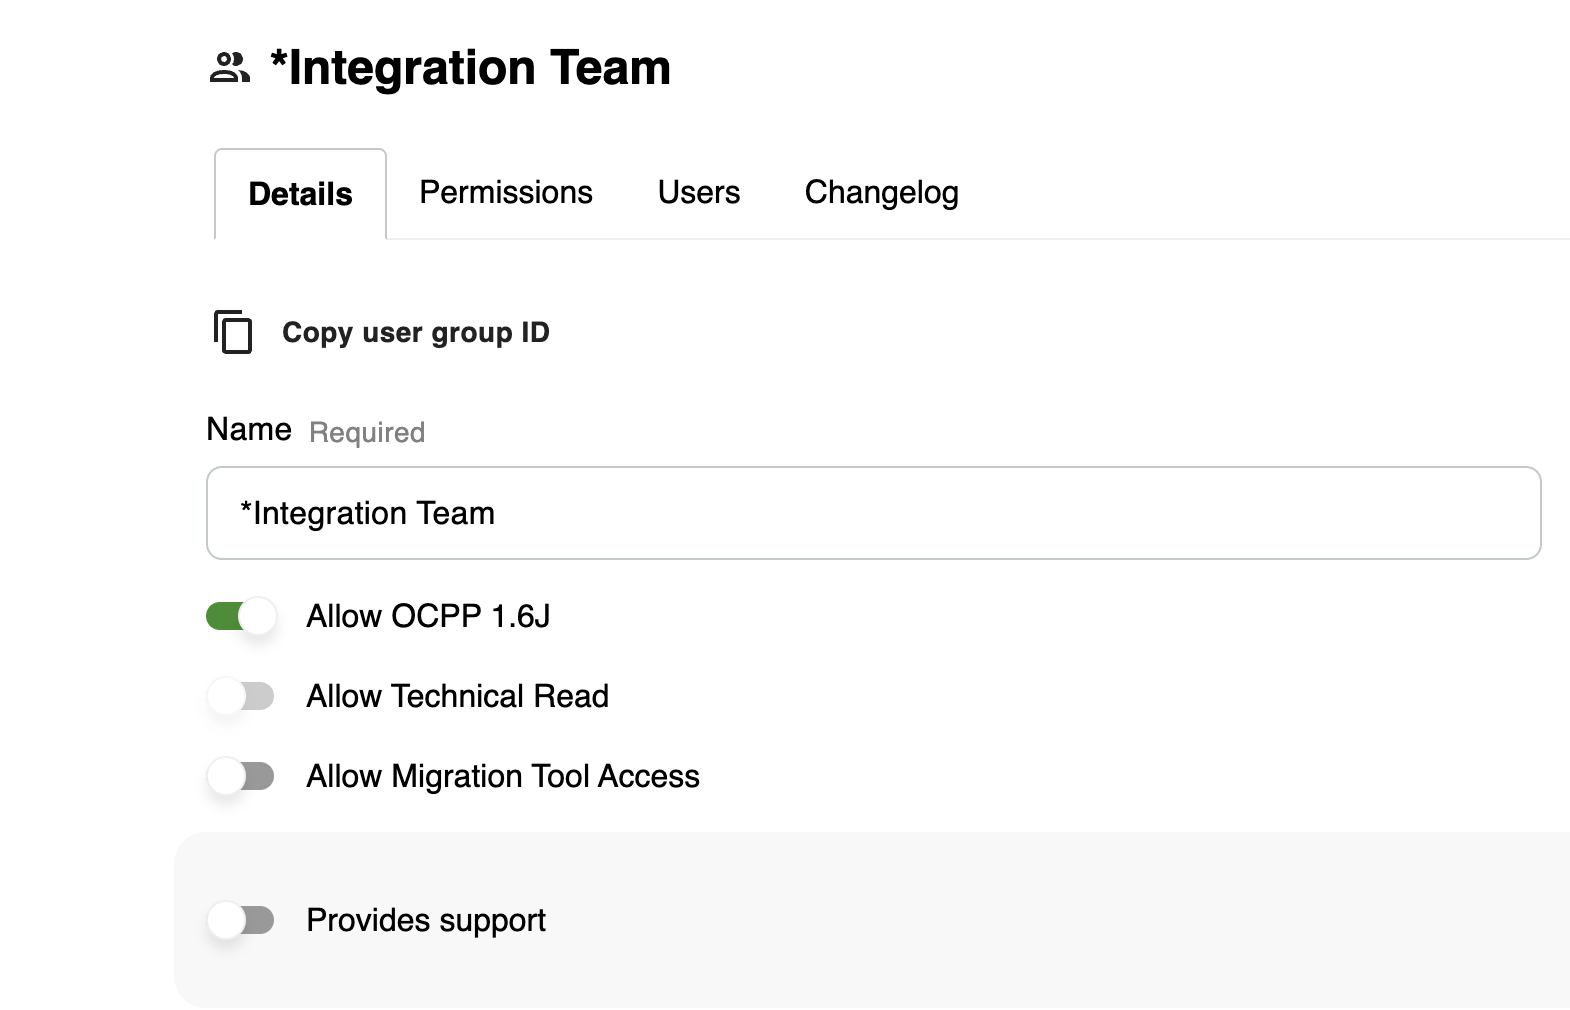
- Navigate to User Groups and select your company’s group.
- Check if Allow OCPP 1.6J is enabled. If it is, you have the required permissions. If not, contact your Zaptec sales representative to request access for your organization or User Group.
Membership in this User Group determines who can enable OCPP1.6J. You may consider creating a separate group or requesting permission for your existing group.
Getting OCPP 1.6J Firmware
To enable OCPP 1.6J, ensure your charger is running a supported firmware version:
| Model | Firmware Version Requirement |
|---|---|
| Zaptec Go EU All variants | Only compliant from FW version 2.4.2.4+ |
| Zaptec Go UK | Only compliant from FW 2.5.1.0 + |
| Zaptec Go 2 All variants | Only compliant from FW version 3.2.1.0 + |
| Zaptec Pro, all variants from Serial Numbers ZPR080000 and up, as well as ZPG | Only compliant from FW 7.5.4.0 + |
Updating Firmware
- Open the Zaptec App or Zaptec Portal.
- Check for available firmware updates.
- Install the latest available firmware.
If no updates are available, contact Zaptec Support.
Older Firmware Versions
If your charger firmware is below the required version:
- Submit a support ticket including the charger serial number(s).
- Request OCPP 1.6J-capable firmware.
- Once the request has been processed, check again for firmware updates and apply them.
After updating, your charger will support OCPP 1.6J and you can proceed with the setup.
Setting Up a New OCPP 1.6J Installation
For new installations, follow these steps:
-
In the Zaptec Portal, go to Installations and click + Add installation.
-
Enter installation details.
-
Save the installation.
-
Under Circuits, click + Add circuit and enter the circuit details.
-
Click + Add charger, enter the charger details (serial number), and activate.
-
Installation is ready now for activating OCPP1.6J.
Activating OCPP 1.6J on an Existing Installation
Before enabling OCPP1.6J mode on an existing installation, OCPP1.6J permission must be granted in the Zaptec App or Zaptec Portal by the installation owner.
Granting Partner Access
-
Request a partner lookup key (four characters) from your OCPP provider.
-
The OCPP provider can find this key under their User Group with Allow OCPP 1.6J permission.
-
Use the Zaptec Portal or App to grant access:
In the Zaptec Portal:
- Go to Installations > Permissions > Give Permission.
- Select Partner, enter the lookup key, and confirm Service access.

In the Zaptec App:
- Open the app and go to Installations.
- Tap Access > Add Access.
- Select Partner, enter the lookup key, and confirm Service access.

Enabling OCPP 1.6J Mode
- In the Zaptec Portal, open the Installation.
- Ensure chargers are online and no active charging sessions are running.
- Navigate to Settings > Authentication > Type and change authentication type to OCPP 1.6J authentication.
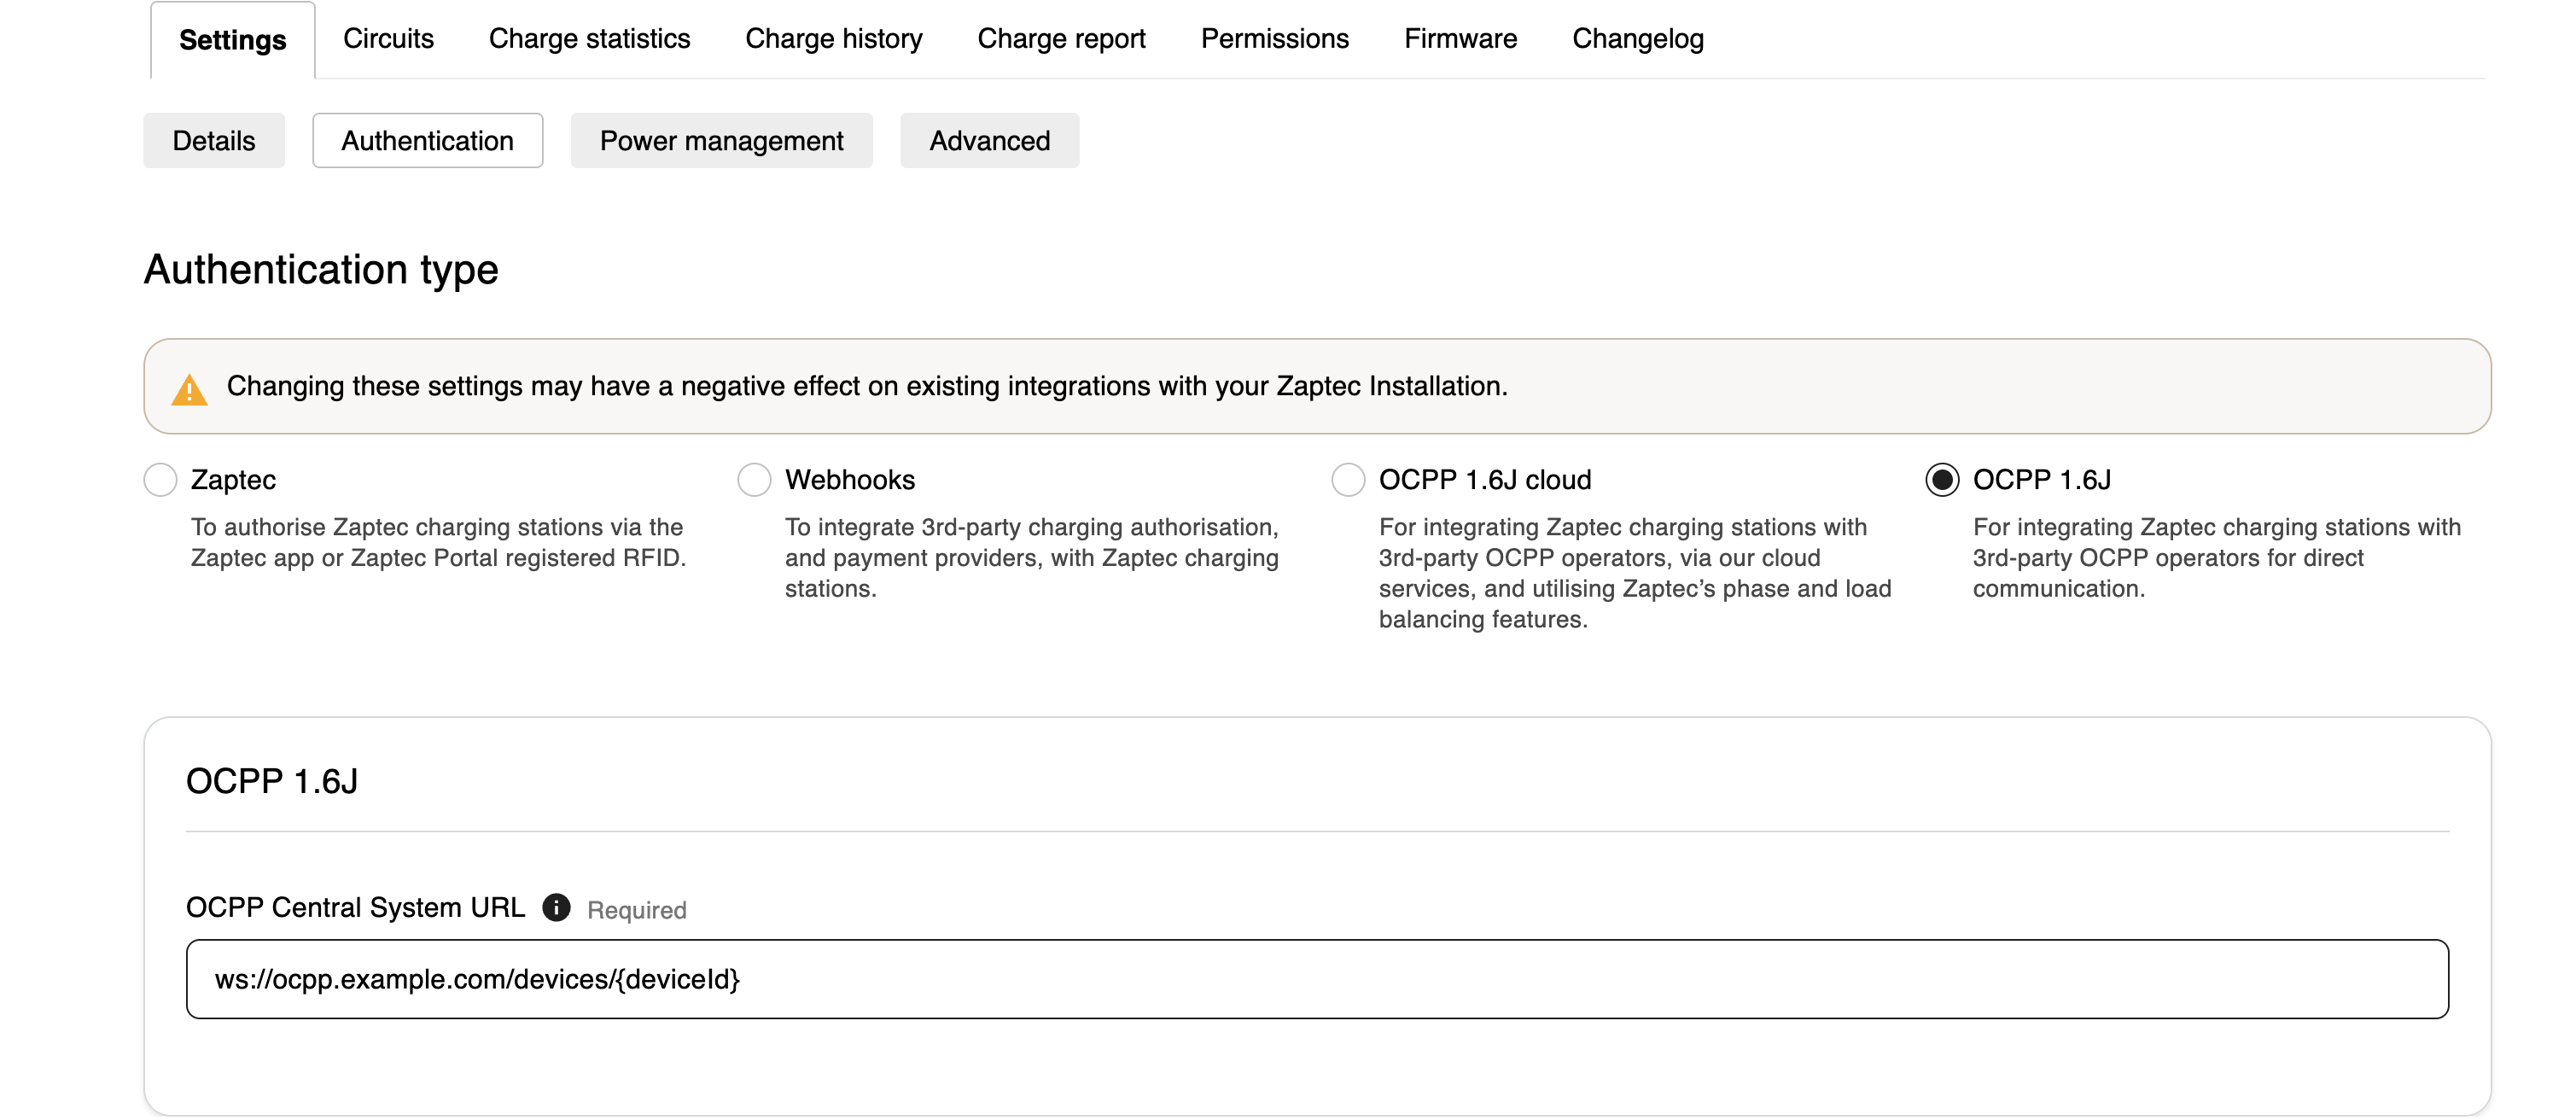
- Enter the OCPP central system URL, following these rules:
-
The URL must begin with ws:// or wss://.
-
Maximum URL length: 2038 characters.
-
The connection port is optional. If omitted, the default ports are 80 (ws://) and 443 (wss://).
-
Do not include the charger serial number in the URL; it will be automatically appended in uppercase.
Example:If the required OCPP URL is
wss://myserver.com:80/ocpp/ZAP123456, whereZAP123456is the charger’s serial number, enterwss://myserver.com:80/ocppin the OCPP central system URL field.
Recommended:While OCPP 1.6J supports both WS and WSS, Zaptec recommends using WSS for ensuring authenticity and confidentiality during communication between Charge Point and Central System, in accordance with SS:EN 18031-1:2024.
- Click Save.
- Once saved, OCPP 1.6J is activated on the chargers in the installation. Installation will be marked with OCPP 1.6J in a header.
- If you click on Circuits again and chargers below have green OCPP symbol, it confirms a successful connection.

Permission requiredIf you encounter an error, it means that OCPP 1.6J permission has not been applied to the installation. The installation owner must grant this permission before enabling OCPP 1.6J.
- Navigate to User Groups and select your company’s group.
- Check if Allow OCPP 1.6J is enabled. If it is, you have the required permissions. If not, contact the installation owner or your administrator.
Note that installation type limitations for Home and Pro installations still apply.
Configuring One Phase Charging (Zaptec Pro)
For Zaptec Pro chargers operating in OCPP 1.6J mode without Zaptec power management, Zaptec supports configuring which phase should be used for single-phase charging.
This setting is used to help distribute chargers across available phases and reduce the risk of overcurrent on the installation circuit breaker.
The One phase setting is only applicable for:
- Zaptec Pro chargers
- OCPP 1.6J installations
- Installations without Zaptec power management enabled
If Zaptec power management is enabled, this setting is ignored.
Automatic Phase Distribution
When OCPP 1.6J mode is enabled on a Zaptec Pro installation, Zaptec automatically distributes chargers across available phases using a round-robin strategy.
Example:
- Charger 1 → φ1
- Charger 2 → φ2
- Charger 3 → φ3
- Charger 4 → φ1
This initial configuration can later be adjusted manually per charger if needed.
- Allowed values are 1, 2 and 3; the default is 1.
- On TN grids the value maps directly to the corresponding line (1 → L1, 2 → L2, 3 → L3). On IT grids it selects a rotating line pair.
- Changes only take effect when no vehicle is connected.
Manually Configuring the One Phase Setting
- Open the Installation in the Zaptec Portal.
- Navigate to: Circuits ->Select the charger ->Open Settings
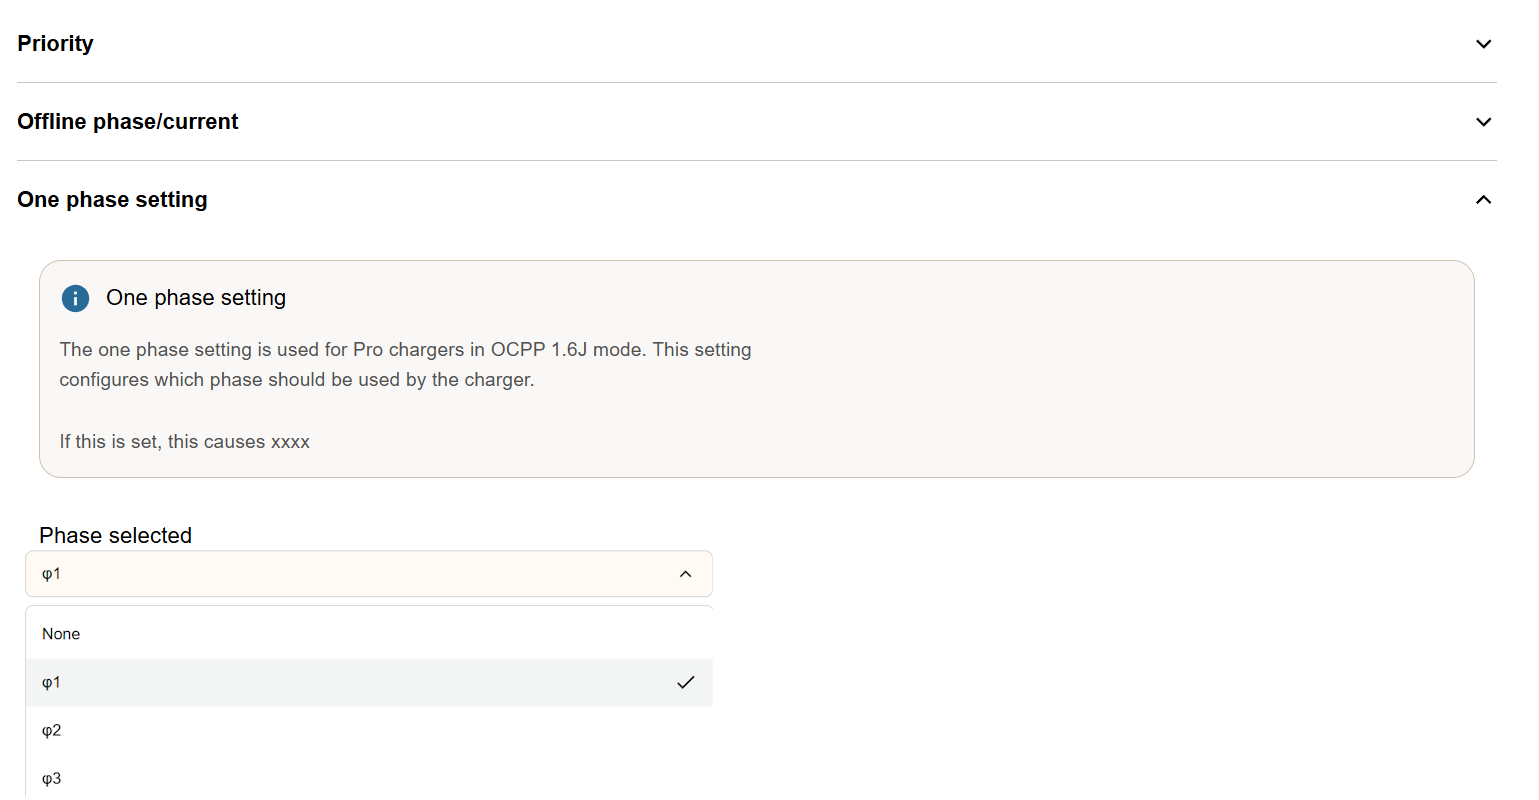
- Expand the One phase setting section.
- Select the desired charging phase:
-
φ1
-
φ2
-
φ3
-
- Click Save.
N.B
- The selected phase is used when the charger detects a single-phase charging session.
- This setting corresponds to the internal configuration:
OcppNativeOnePhaseChargingPhase- The setting is primarily managed via the Zaptec Cloud, where default phases are assigned automatically. It can also be updated through the Zaptec Portal. When the authentication method is set to OCPP 1.6J in the Zaptec Portal, a pop-up describing this function will also appear.
- Incorrect phase distribution may reduce available installation capacity or trigger circuit breaker protection.
Identifying OCPP 1.6J Mode
You can verify if your charger is in OCPP1.6J mode by checking the OCPP boot notification message:
- OCPP 1.6J mode:
"chargePointModel": "Zaptec Go OCPP" - OCPP Cloud mode:
"chargePointModel": "Zaptec Go"
Troubleshooting Unsuccessful Connections
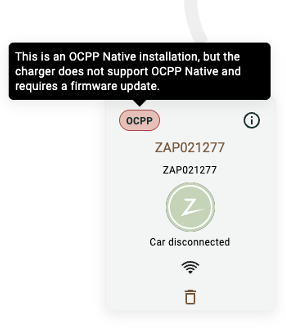
Red OCPP Symbol & Warning Message
If the connection fails:
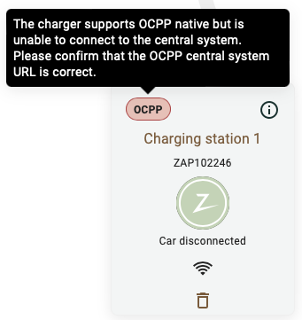

- Check your OCPP URL for errors.
- Verify your network connection.
- Ensure your firmware version supports OCPP1.6J.
If the charger doesn’t support OCPP1.6J, you’ll see a red OCPP symbol and a warning message.
Disabling OCPP1.6J Mode
To disable OCPP 1.6J mode:
- In the Zaptec Portal, go to the Installation.
- Ensure all chargers are online. It is also recommended that chargers are in Disconnected mode.
- Navigate to Settings > Authentication > Type, and change authentication type from OCPP 1.6J authentication to desired authentication mode.
- Click Save.
After disabling OCPP1.6J mode, chargers will switch to Stand-alone mode. To re-enable Zaptec power management and authentication, go to Circuits > Charger > Settings and turn off Stand-alone mode.